Thursday, April 3, 2014

Desktop Storage

While in the process of clearing my table off I decided to create some type of table top storage.  This is what I came up with:
The storage unit is made up of individual boxes thar were then attached to each other.  I did stagger some so i could see what type of punch they were.  On those I sraggered I did attach a piece of chipboard on the back and sides to help it stand up and to add additional support.  I also wanted my Martha Stewart score board to be readily available.  I just added a bigger box to the back.
Here is how I created the boxes.
First I decided to figure out how big the box needed to be by measuring the tool.  I measured the width, the height, and the depth.  The height is based on how high up the tool you want the box to go .


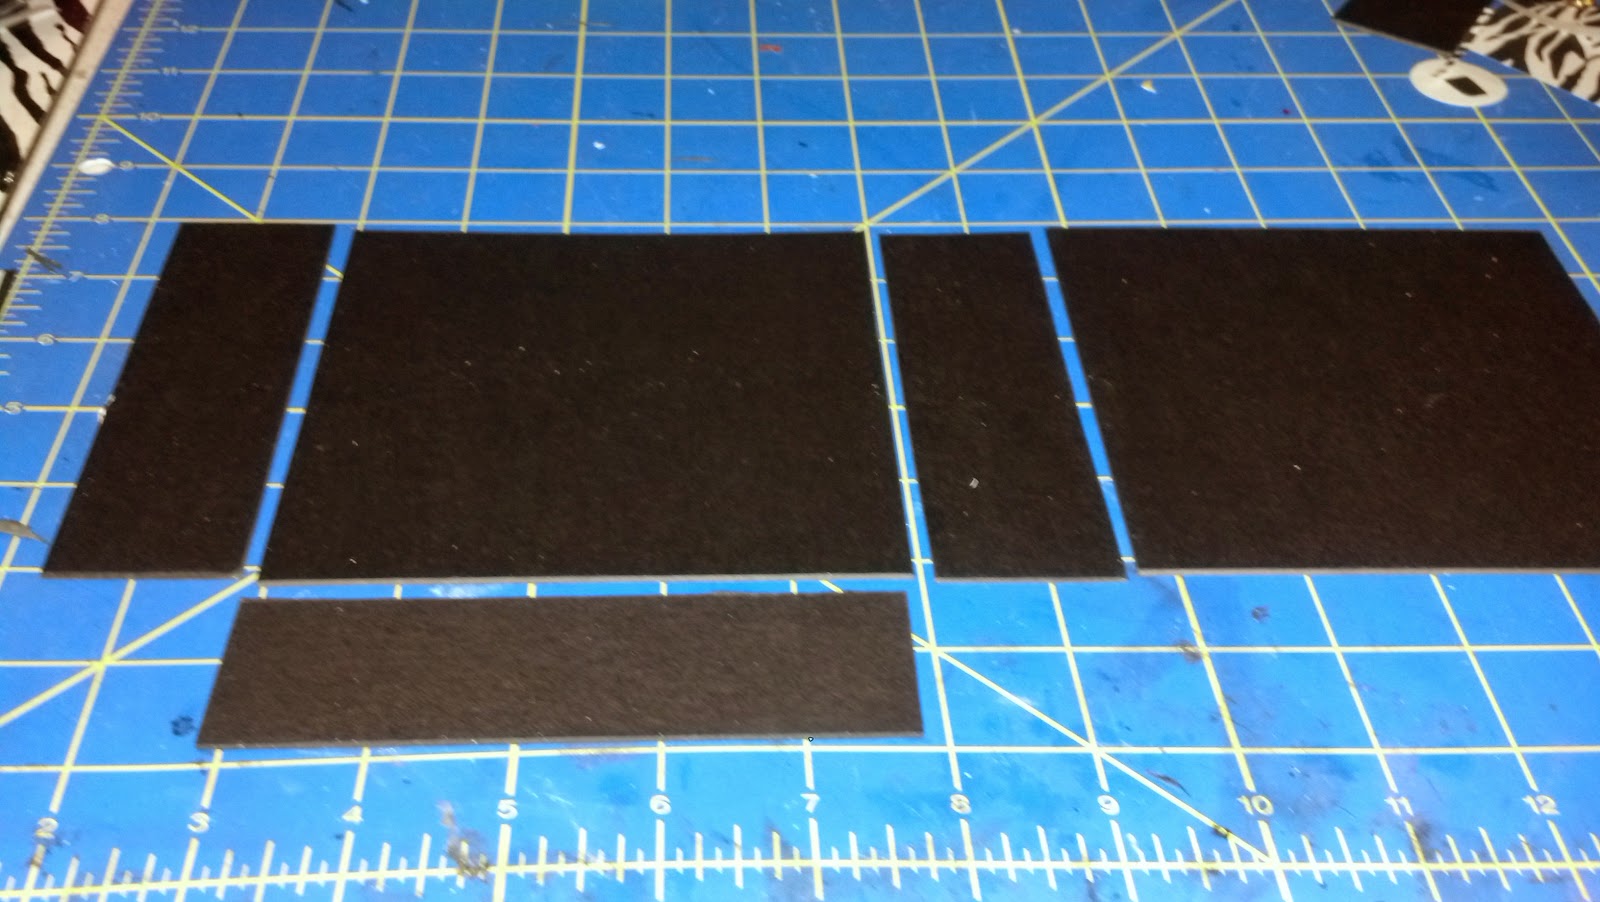
I then cut my chipboard accordingly. In the case of this tool I cut my chipboard the following  size:
5"x5" - cut two for front and back.
1 1/2" x 5" - cut two for sides
1 1/2"x5" - cut one for bottom
I listed the bottom separately because it   is not always the same size as the sides.  I lined the pieces up  in the following orser.
I then used construction strips to attach them.   The strips are 1" wide and scored down the middle.  Then add score tape to each half but  do not cover score line.
See picture below with sides and bottom attached.
Then connect to form a box then attach bottom.


Please look at the tutorial for the tissue box to get some pointers on using construction strips to construct boxes.  
After box is constructed make sure the tool fits in the box before attaching it to other boxes.  

I made sure my tool fit in the box both ways.
I then added adhesive to the side I was connecting.
I then added it.

I then added paper and ta da...I am done.


Saturday, March 29, 2014

Storage

I have really been in the storage mode lately.  I thought I would share some of  my recent projects.  Please note, I have not really gotten into tutorials, as you can tell from my previous post.  The base of the idea for the following items was from a lady on YouTube named Ozegran.  If you search for her on YouTube you will find some of her tutorials.  I used her basic measurements for the stickles storage and then changed the measurement to make storage for my paint daubers, distress stains and alcohol inks.

The above stickles storage holds 96 stickles and it is full. I have since replaced the turntable with one that does not take up as much space.  I was motivated to do these storage items because of the concept of out of sight out of mind.  If I don't see the items, I don't think to use them.
 
Here are my other spinners, just resized to fit other embellishments.
 

I then went to a crop and using the same basic concept, I helped create marker storage for someone else. 
I gave it to them to decorate.  The box on the side will be used for incidentals, and I also made a taller box to go behind it to hold her rulers.  Like how it came out.  Thanks for looking.


Tissue Box and Baby wipe storage.

I was sitting at my desk one day and had a tissue box sitting there and decided to see if I could make some type of storage for the tissue box.  This is what I came up with.
When I created it, my initial intention was to  use the drawer to hold a mini album.  Then I decided I would either use it for my baby wipes or for those little things that end up on my desk that just get in the way.  After posting pictures on Facebook, I had quite a few people ask for a tutorial. I have made another one and will do a basic tutorial for this project.  You may need some basic understanding of on chipboard construction.
Materials:  Medium weight chipboard 5 or 6 sheets, adhesive, I used both the Scotch quick dry and double sided tape (Score tape/Scrappy Tape/Miracle tape) and paper to decorate if desired
 
Cutting;
Chipboard
:
Front/back  - 9 1/2" x 6" cut 2
Sides - 5 1/2" x 6" cut 2
Top/Bottom - 10 3/8" x 6 3/8" cut 3
Base - 9 1/2" x 5 1/2" cut 1
Drawer front - 8 3/4"x 3 1/4"  cut 1
Drawer sides - 5 3/8" x 2 5/8" cut 2
Drawer sides - 8 1/4" x 2 5/8" cut 2
Bottom Drawer - 5 3/8" x 8 1/4" cut 1
Ledge - 3" x 5 1/2" cut 2
Shelf for tissue box - 5 1/2" x 9 3/8" cut 1
Lid lip - 9 1/4" x 1/2" cut 2
Lid lip - 5 1/4" x 1/2" cut 2
Frame - 4" x 4"
 
Cardstock Construction Strips
2 sheets 12 x 12 cut into 1"x12" strips, scored at 1/2" and adhesive applied.
 
Construction strips are used to put the project together.  I find it is easier to use a double sided adhesive and not a wet glue.  You can use a wet glue, just ensure it is fairly quick drying.   Still cut construction strips but add your wet adhesive as you use the strips.  I have never done it that way, it just seams like it would be a little messy.
 
Here is a construction strip, before I have added the adhesive.  Below is an after shot.
Here are my construction strips after adding adhesive.  Ensure you do not cover the score line.
 
I begin construction of the box by first cutting the opening in the front for the drawer.  My drawer opening is 8"x 3". If centered correctly you will end up with 1/2" from each edge.
Now I am ready to assemble.   I first need to add a ledge for the tissue box shelf to sit on for security.  I attach the 3 x 5 1/2  ledges to each of the sides.  I used wet glue for this.
 
I then began constructing the box. I used the construction strips to attach the front and the back to the sides.  I cut 4 strips to the height of my box.  I attach the strip from the back of the chipboard piece and set the next piece vertical to the front/back to ensure proper spacing. Once the piece is set in vertically, bring the construction strip to it.  It is ok if it fall down once attached.  It will all come back together when all sides are attached.
Do this same thing to the sides/back and front.  Pieces should be attached in the following order:  front - side - back - side
Before finishing the square, add some wet glue to the grooves in the construction strips.  Then add the front to the final side to close up box.
 
Then complete the square. Sorry did not get a picture of completed square. Please understand that by connecting the front/back and sides you complete a square.  You will then attach construction strips to the base.  I sometimes cut construction strips ends cut at 45 degree angle.  It just reduces some of the bulk.
Here is a picture of the base with construction strips added.
Please notice that construction strips are only added around 3 sides of the base.  The fourth side is where the opening of the drawer is located.  I cut a 1/2"  piece of construction  strip on the left and right side of the base where it will attached to the front of the box.
Once you complete the base of the box, take time now to burnish all the construction strips with a bone folder.  This will ensure proper adhesion.
It is now time to assemble the drawer. It is done the same as the main box.  Here is a picture of the completed square of the drawer.  Notice wet glue was added to the seams again for added strength.
 
You will then add construction strips to the drawer bottom:
 
You simply do the same as above, set the drawer on the base of the drawer and  bring construction strips up to the sides.
 
You can then add construction strips to the tissue box shelf.
You will then add a bead of glue to the tissue box shelf ledges that are attached to the sides
Then attach shelf.
Sorry these are kind of out of order.  But will not have an impact on the final project.
Now lets work on the lid. I used two layers for the lid.  One has a 1 1/2" square hole cut out of it so that you can get the tissue out of the box.  I Cut a 2 1/2" square out of the second lid, and then glued the two lids together with the smaller hole on the bottom to give it this look:
I also added a 4 " square frame to the top of the decorated box.  The four inch square has a three inch square cut out of it to create a frame (frame is totally optional.).  You can take time now to cover the box with paper. To cut the holes in the lids, just find the centers and cut the different size holes. You do not have to have a double layer lid, I just liked the look.
 
The holes cut  out and stacked.  You can cover both the lids and then glue them together.
This is how it looks from the inside.  Ignore the lip for now. Notice I cut an "X" in the hole and then pulled the paper to the inside/bottom of the lid.
 
Cover your drawer front.  Add adhesive to the drawer and place it in the slot for proper placement.


Then position your drawer front.  Pull drawer out and ensure properly secured.
 
We now need to work on the lip of the lid to keep the lid from slipping off.  In this case instead of using regular construction strips, I cut 3 strips of paper 1/2" to connect the lid lip pieces to each other and then used construction strips to attach the lip to the lid.

I still attached to chipboard pieces to each other the same way, using the 1/2 inch strips as the connection base.
Then add the construction strips to the lip after you have formed the square, just like above.
 
Now you can attach it to the lid, ensure it is center.
Then cover the inside with paper if desired.
 
 
To finish add a knob or some type of drawer pull. 
I have not completed the frame on this project yet.  But that is the completed box.  If you don't understand any of the instructions please leave me a message. 
 

Wednesday, August 28, 2013

Mini mini Album

Below is a mini album I created using five #10 envelopes.  Love the way it came out.  It is only about 4"x 4 1/4, but has lots of real estate for pictures. 

The paper I used was a Prima 6"x6" stack.  It was actually some leftover paper from a smaller mini I had done.  I was trying to use it all up and I did.  Only thing left is some really small scraps and a couple of tags from the paper and I will probably add that just to get rid of it and to not have to throw it away.  I kept the embellishments to a minimun so that I could focus on the paper.  The roses are both from Prima, as is the pearl bling.  The frame is something I have had forever and have no idea where it came from, maybe the dollar store,   the black on the edge is some  ribbon roses that you get by the yard at Hobby Lobby.  The hard plastic roses came with the pearls.

Haven't done anything with the inside cover, but feel I need to do something, that is probably where some of the left over tags will go.  The right side is a mat and a half.  I used two different Martha Stewart punches to dress up the edges of the mats.
This is still page one, The tab thing in middle of the page actually lifts up and the tags come out.  The flap just fits inside a slot at the bottom of the page.  Love how the band looks like a cigar band.  I had to do a lot of piecing together, since I was using left over paper.
Pages 2 & 3.  Kept them pretty simple, both pages have double mat for a photo.  And all pages have a pull out mat. You may not be able to tell from the picture, but page 2 is actually larger than page 3.  On the larger pages I used a black photo mat, and on the smaller pages I used the peach photo mat with a different edged puch. 
Pages 4&5.  Pretty simply, a little of piecing to be able to cover the pages.  The flap is magnetized and hides a photo mat.  The brackets are fussy cut from the paper.  I have had those round paper clips for a long time and decided I need to start using what I already have.
Page 6&7.  There is a band across the photo mat, which allows a picture to slip behind it.  There is also another photo mat behind the peach mat.  Page 6 is the photo mat and a half..
This is the page 7 photo mat and a half folded out.  There is one of those small Paper Studio paper bags there, mostly hidden by the matting, but it also has a photo mat inside.  I like how the angled pocket came out on page 6.  Added a couple of fussy cuts and glossed them up.
Pages 8 & 9.  Page 8 is accordian folded.  Page 9 is large pocket to hold another photo mat, along with fussy cut butterfly with only its body attached to paper.
Not a great picture of the accordian fold, but it will basically hold 9 pictures.
Page 10&11.  Kept it simple, but the left side has a kind of gate fold feature.
A picture of the gatefold opened up.
Pge 12 & 13.  Started running out of paper, so used some black paper and embossed it.  Attached corners will allow for a large matted picture to be placed on these two pages.
Page 13, the mat and a half.  Simple, but love how it came out.  Just glued the top and bottom of a piece of scrap and placed it over some of the embossed paper and stuck a couple of tags behind it.
Page 14 & 15.  Pocket on page 14 and a photo mat on page 15.
Page 16&17.  Kept it simple.  Used some of the leftover pearls to go around the mat on p17.  A little fussy cut on page 16.
Page 18.  A waterfall.
The waterfall is magnetized.  Ended up using two sets of magnet, one near the top and one near the bottom, so it would lay flat. 

As I mentioned earlier, there is a lot of real estate in this mini.  Now I need to print some pictures for it.